API basics
After installing Agastya on your website, you can start using the client side API.
Identifying your version
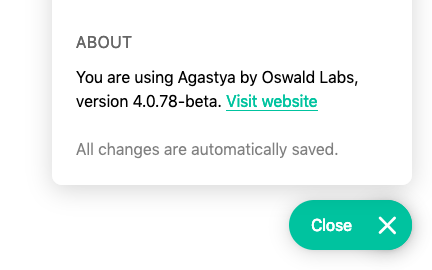
If you've signed up for Agastya in 2018 or 2019, you are automatically upgraded to Agastya 4. You can check this by opening the Agastya widget on your website and going to Settings → About.

Version 4 and above
As soon as Agastya has loaded on your website, you can start using the API. In the global window object, you can define agastyaSettings and listen for the "ready" event:
window.agastyaSettings = window.agastyaSettings || {};
window.agastyaSettings.on = {
  ready: agastya => {
    // Now, you can use `agastya`:
    // For example, open the Agastya widget:
    agastya.open();

    // You can also use the global `agastya` object:
    window.agastya.open();
  }
};
Using the NPM package
If you're using the NPM package, you can directly start using the API, but each method returns a Promise instead of a direct value:
import Agastya from "agastya";
const agastya = new Agastya("API_KEY");
agastya
  .open() // Return a Promise
	.then(() => console.log("Opened Agastya widget"));
Now that you're all set up, start using the API with widget manipulation.
Configuration
Just like listening for ready events, you can define agastyaSettings in the global window object for configuration. Note that the Agastya loader also defines this object, so make sure you don't overwrite it. It supports the following properties:
window.agastyaSettings = {
  ...(window.agastyaSettings || {}),
  apiKey: "API_KEY", // Your API key (added by loader)
  on: {}, // Event listening object
  appendTo: document.body // Append Agastya to this element,
  backgroundColor: "#007bff", // Button and header background
  foregroundColor: "#ffffff", // Button and header text color *
  heading: "Help & Accessibility", // Widget title *
  subheading: "Oswald Labs Help", // Widget subtitle *
  variables: {
    captioned: false, // Show button label? *
    displayNone: false // Hide button? *
  }
};
Properties marked with * are automatically filled based on your configuration in Agastya Admin.
Version 3.8.2 and below
DEPRECATED
The following guidelines are are deprecated, please upgrade to Agastya 4.
If you're using a version of Agastya before the v4 update, you first have to initialize the API:
agastya.init();
Then, you can start using the API.
The basic structure of a method is agastya.CATEGORY.METHOD. Supported categories are frame and api. This developer documentation is for v4 and above, but v3 users can control the widget like this:
agastya.frame.open(); // Opens the Agastya widget
agastya.frame.close(); // Closes the Agastya widget
agastya.frame.toggle(); // Toggles the Agastya widget
In the api category, the first parameter is the service and the second is the value. Here's an example:
agastya.api("translate", "fr"); // Translate to French
agastya.api("cssClass", "dyslexia"); // Turn on dyslexia-friendly mode